How to Update Your S3 URLs to CloudFront URLs
Author: Ferry Dermawan
Date:
Tags: aws, devops
Amazon Web Services (AWS) provides Amazon S3 for file storage and Amazon CloudFront as a Content Delivery Network (CDN) to accelerate content delivery. Replacing your S3 file URLs with CloudFront URLs is an essential step to ensure your files load faster, more securely, and more professionally.
In this guide, we’ll walk through the complete process—from configuring CloudFront to updating your S3 file URLs.
Why Should You Replace S3 URLs With CloudFront URLs?
Before we dive into the setup steps, here are the main reasons why CloudFront is highly recommended over directly serving files from S3:
- Faster load times thanks to global edge locations.
- More stable performance with content cached close to your users.
- Stronger security with Origin Access Control (OAC), HTTPS, and signed URLs.
- More professional URLs, like
https://cdn.yourdomain.com/image.jpg. - Lower data transfer costs when configured correctly.
Steps to Replace S3 URLs with CloudFront URLs
1. Prepare Your S3 Bucket
Make sure your S3 bucket contains the files you want to deliver through CloudFront.
Checklist:
- Ensure the bucket has the correct permissions.
- Upload all required files.
- You can keep Block Public Access enabled, because CloudFront will access the bucket using OAC.
2. Create a CloudFront Distribution (New UI – 5 Steps)
When you click Create distribution, CloudFront now displays a new 5-step wizard:
- Step 1 – Choose a plan
- Step 2 – Get started
- Step 3 – Specify origin
- Step 4 – Enable security
- Step 5 – Review and create
Below is the detailed walkthrough for each step.
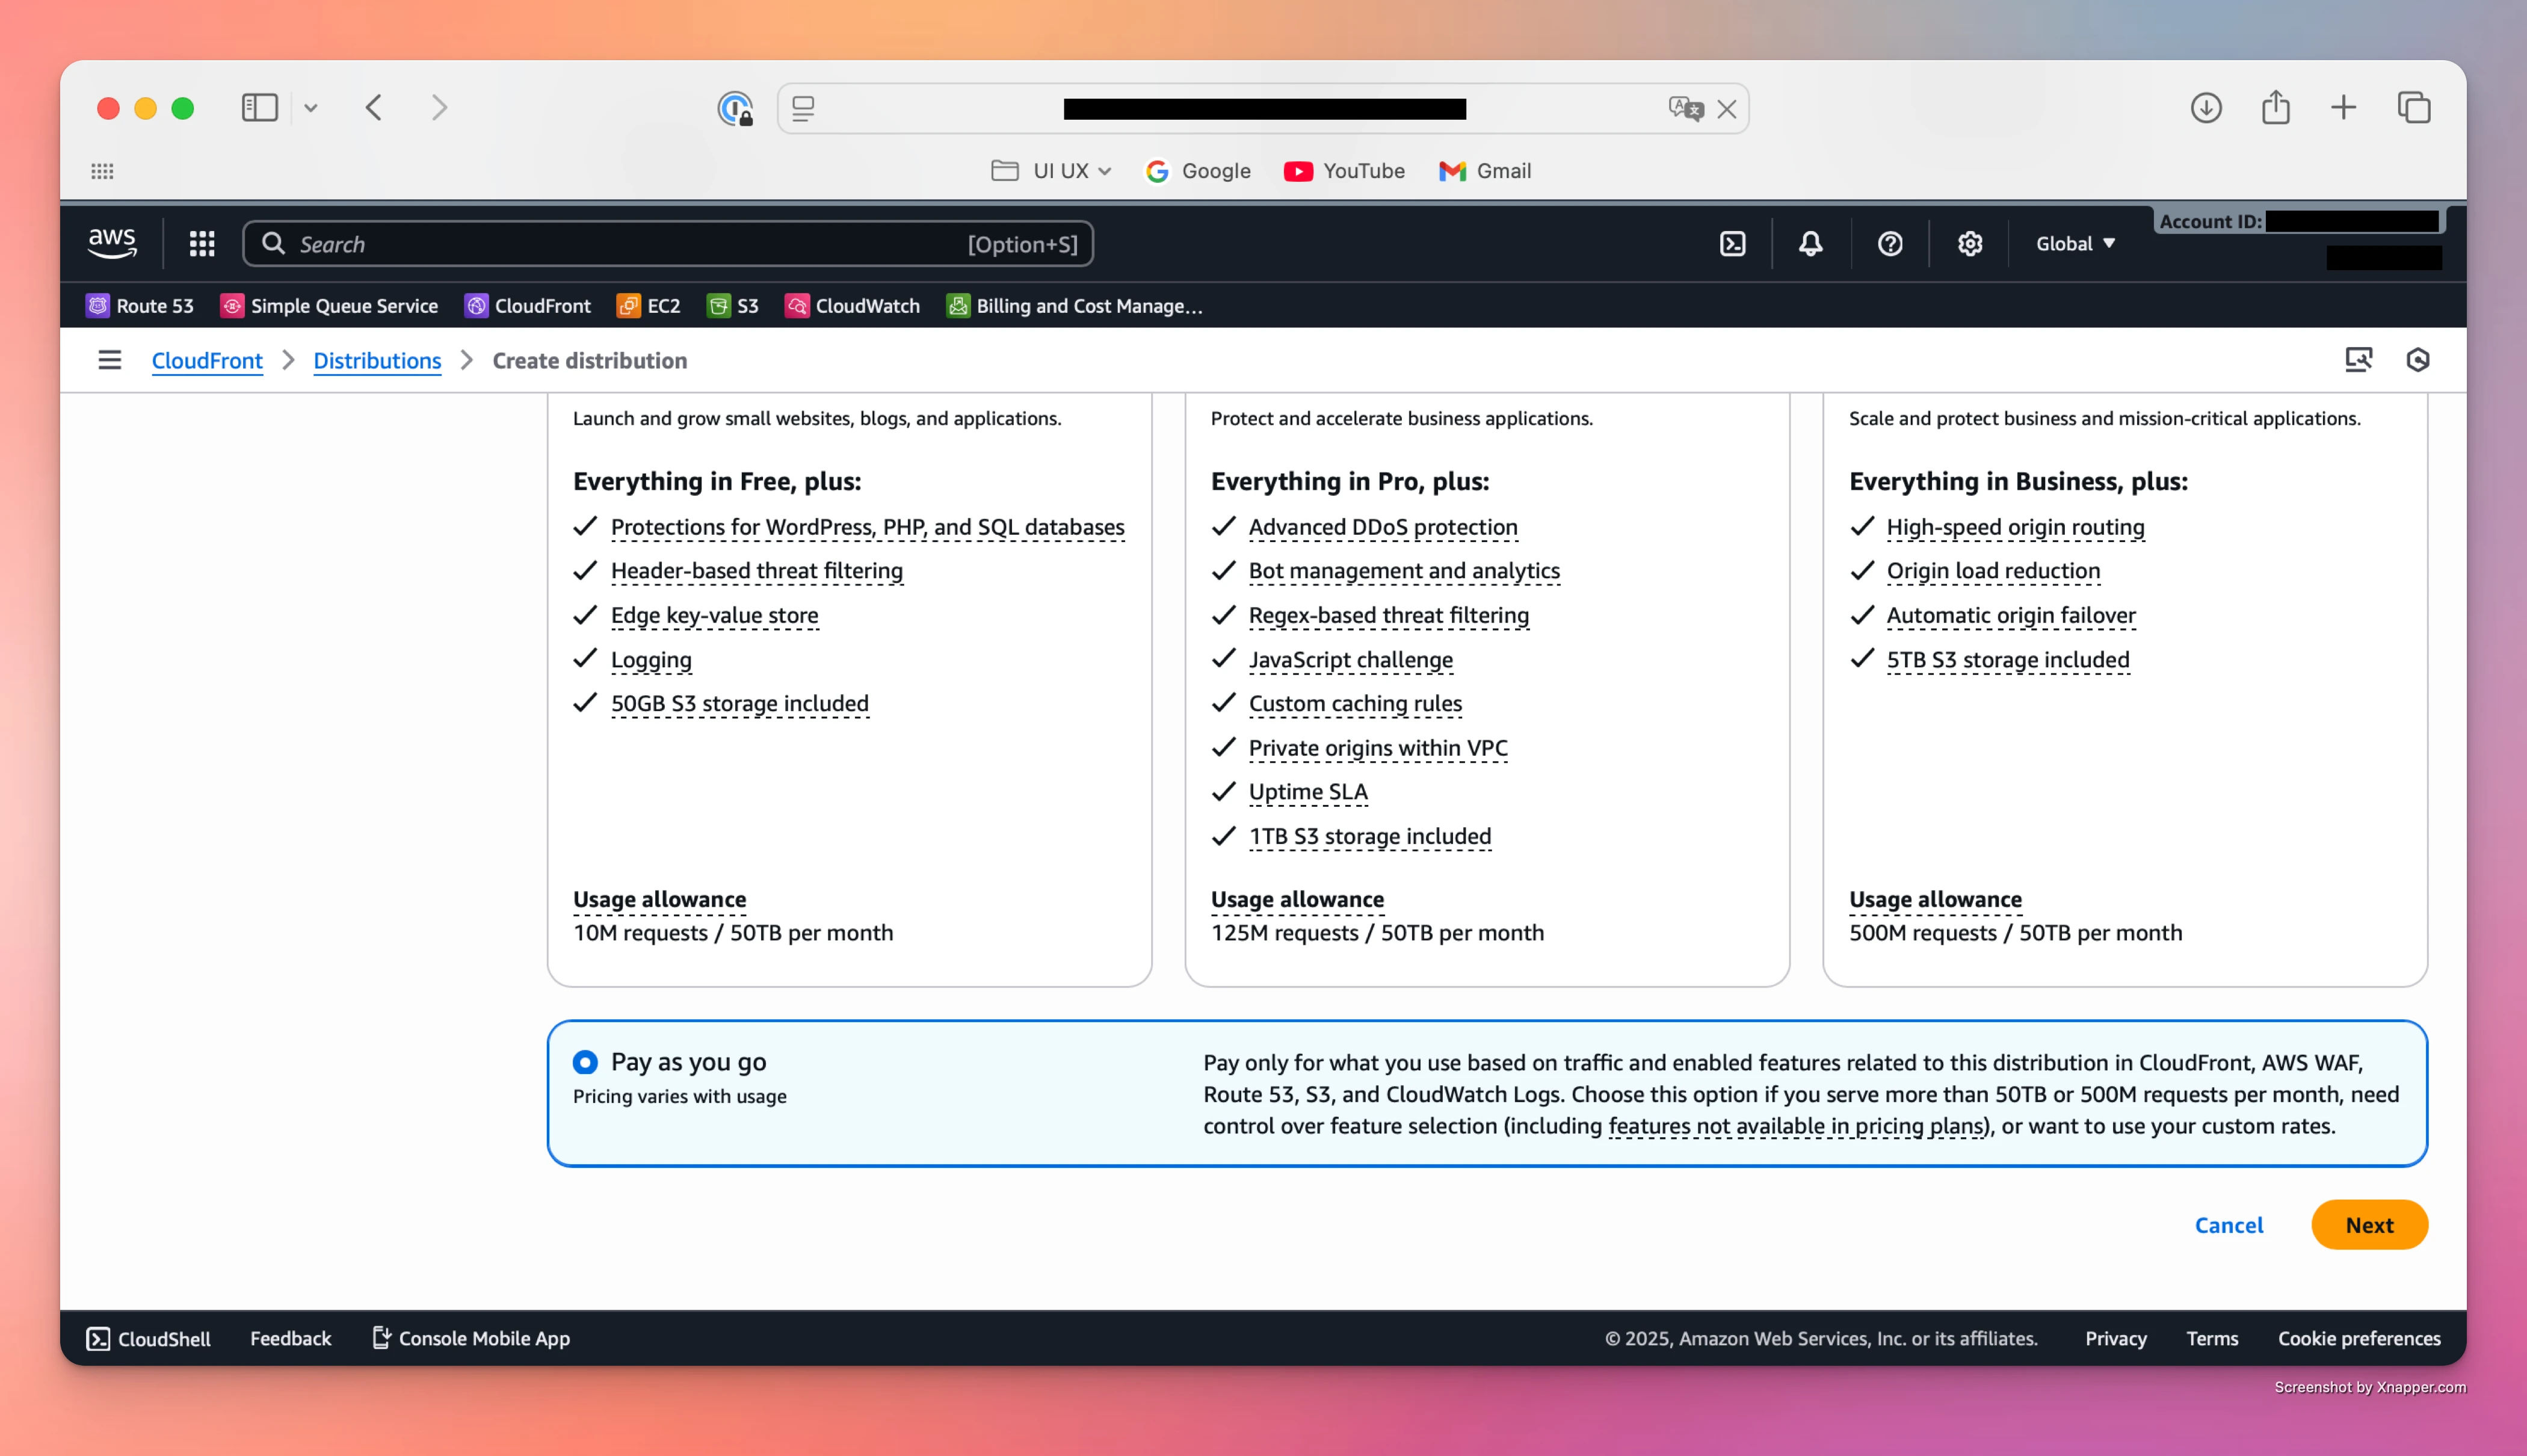
Step 1 – Choose a plan
You’ll see several plan options:
- Free – $0/month
- Pro – $15/month
- Business – $200/month
- Premium – $1000/month
And at the bottom:
- Pay as you go (Pricing varies with usage)
For standard CDN usage (websites, apps, static assets), the best option is:
✅ Pay as you go — no fixed monthly cost, pay only for what you use.
Click Next to continue.
Step 2 – Get started
Here you define the basic configuration of your distribution.
Fields to complete:
-
Distribution name Use a clear, identifiable name, for example:
s3-ferry-example -
Description (optional) You may add a short note, or leave it empty.
-
Distribution type Choose:
✅ Single website or app
(Use Multi-tenant only for SaaS platforms with shared architecture across multiple domains.)
-
Domain (optional) If you have a Route 53 domain and want to attach a custom CDN domain immediately, you may enter it here. If your DNS is hosted elsewhere, you can skip this for now and set it up later using your DNS provider + ACM SSL.
Click Next.

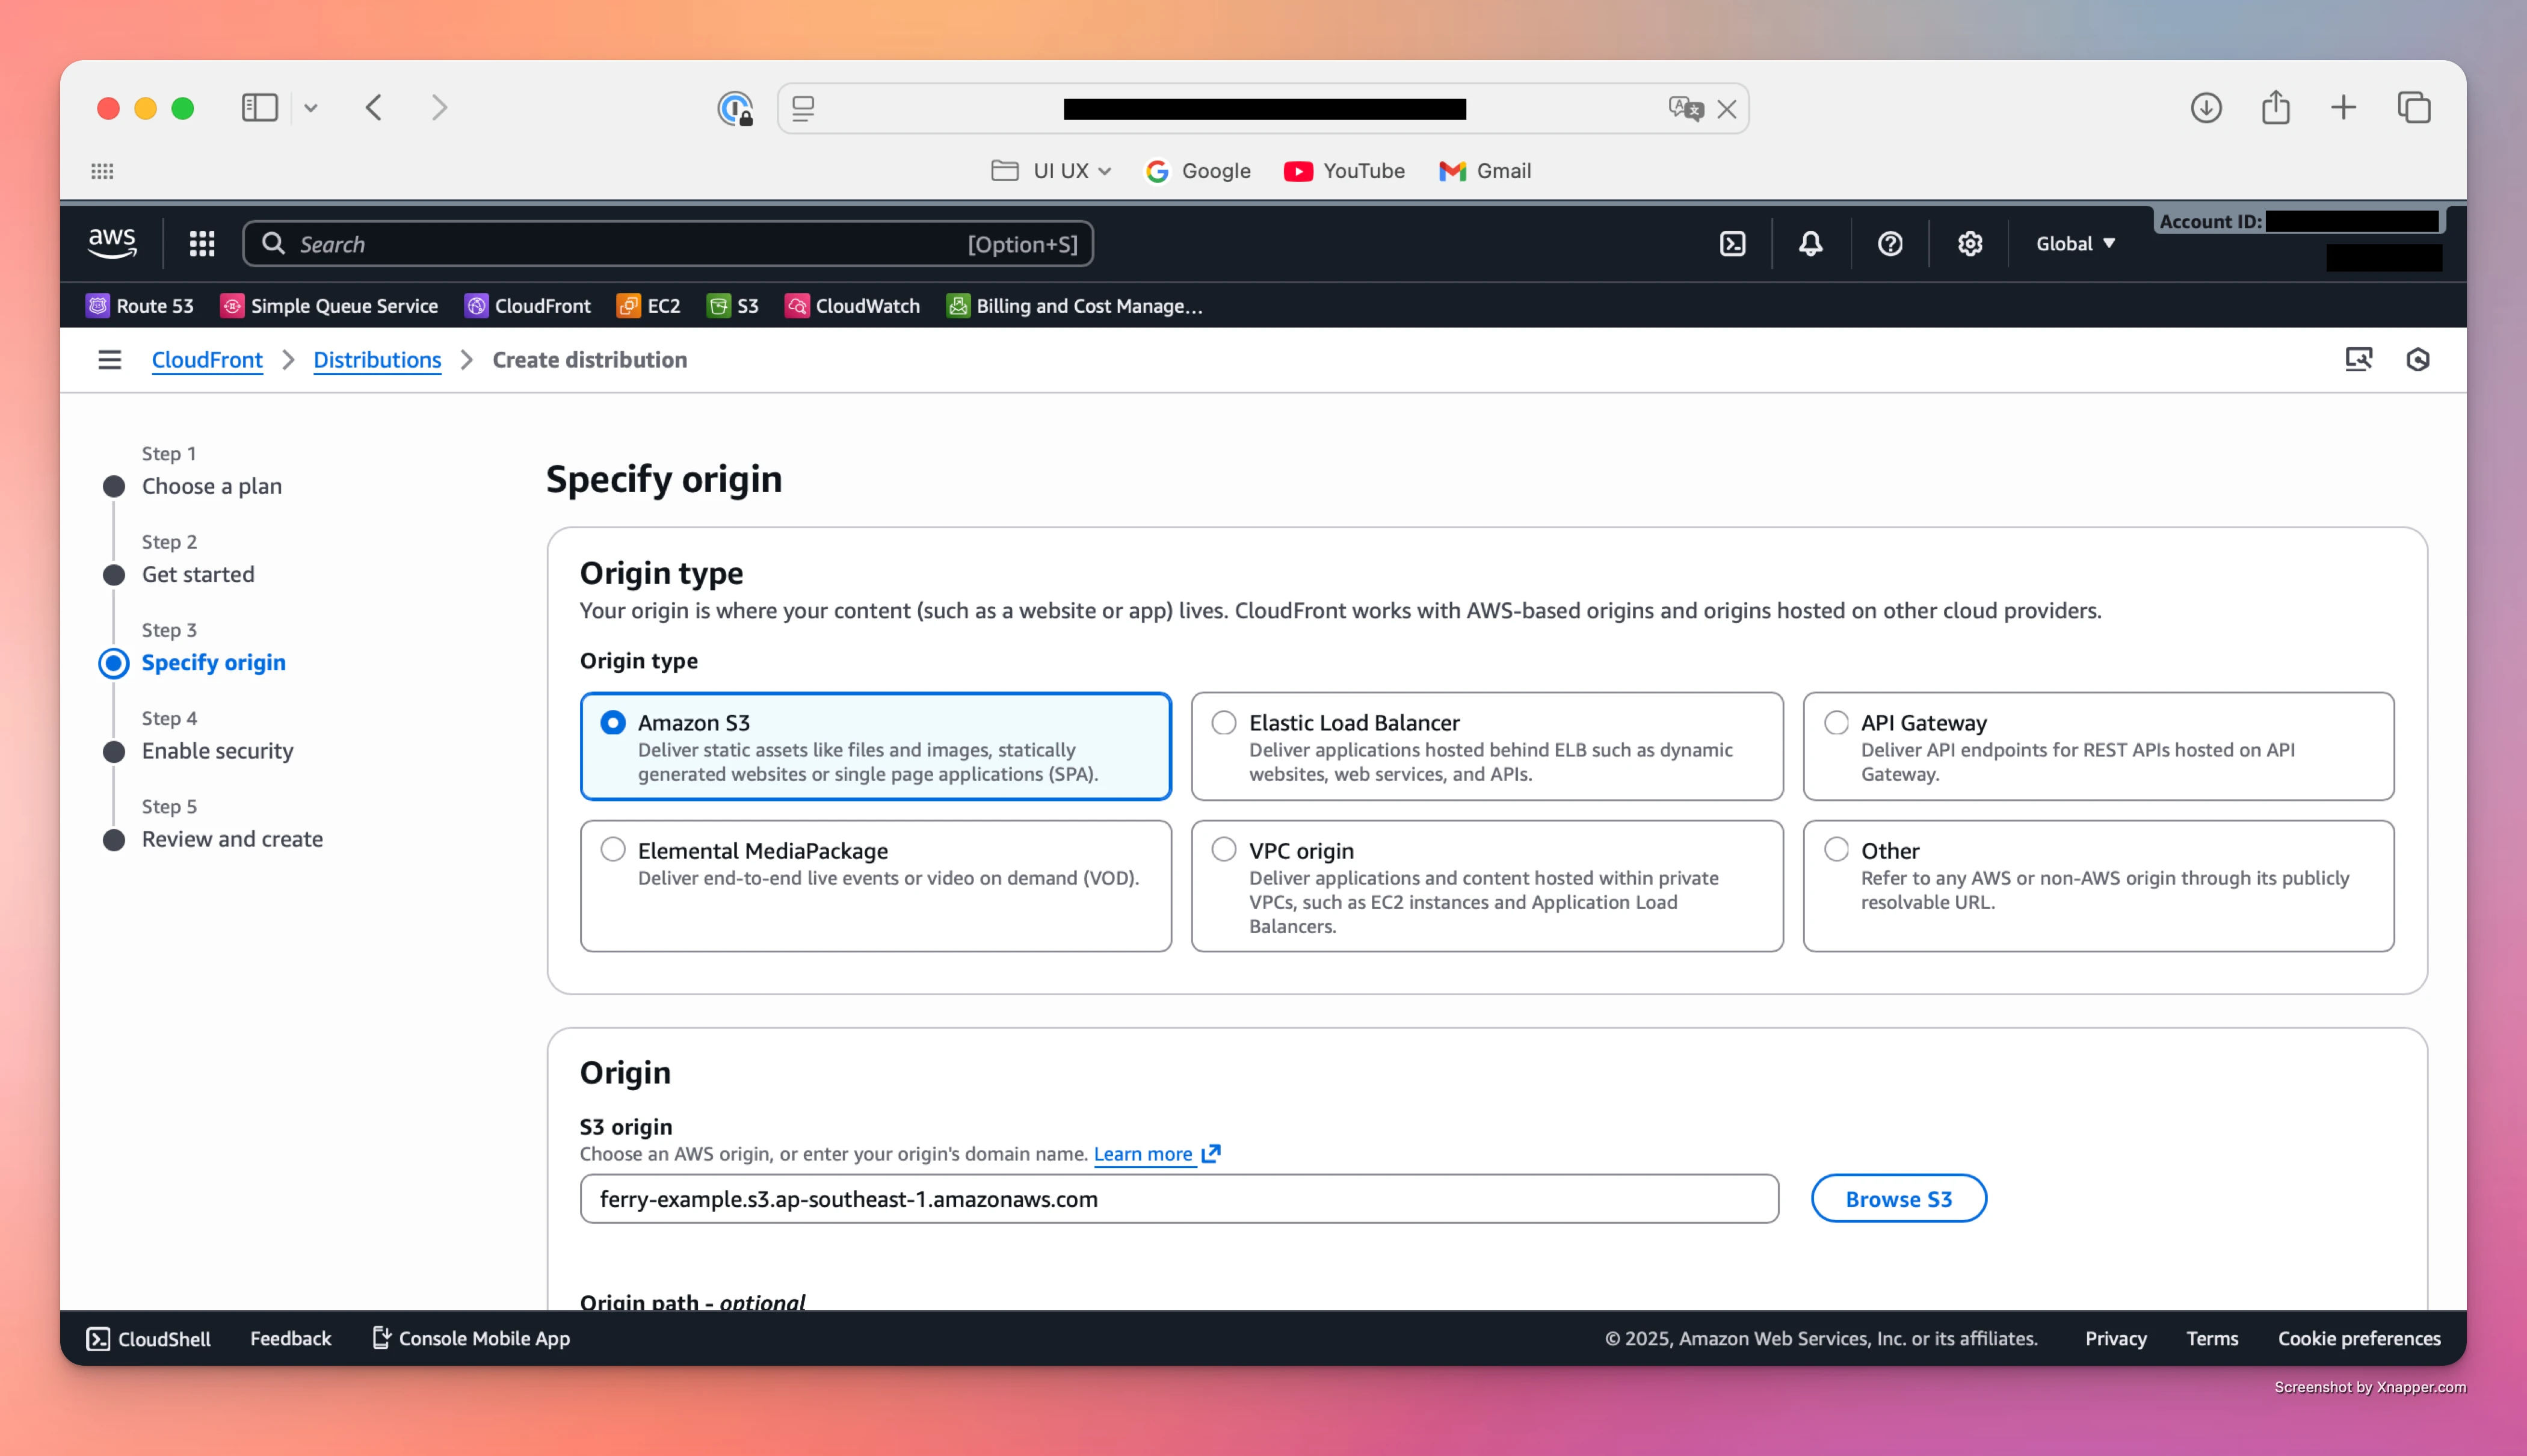
Step 3 – Specify origin
This is where you connect CloudFront to your S3 bucket.
1. Origin type
Select: ✅ Amazon S3
2. S3 origin
Choose or type your S3 bucket endpoint, for example:
ferry-example.s3.ap-southeast-1.amazonaws.com
You can also use Browse S3 to select your bucket.
3. Origin path (optional)
If you want CloudFront to serve only a specific folder:
/path
Examples: /uploads, /assets/images
Leave this empty to serve the entire bucket.
4. Allow private S3 bucket access to CloudFront
This is critical for security.
Check:
✅ Allow private S3 bucket access to CloudFront – Recommended
This ensures:
- Your bucket remains private (Block Public Access ON)
- CloudFront automatically updates bucket policies so only this distribution can access it
5. Origin & cache settings
Default settings are ideal:
- Origin settings → ✅ Use recommended origin settings
- Cache settings → ✅ Use recommended cache settings tailored to serving S3 content
Click Next.
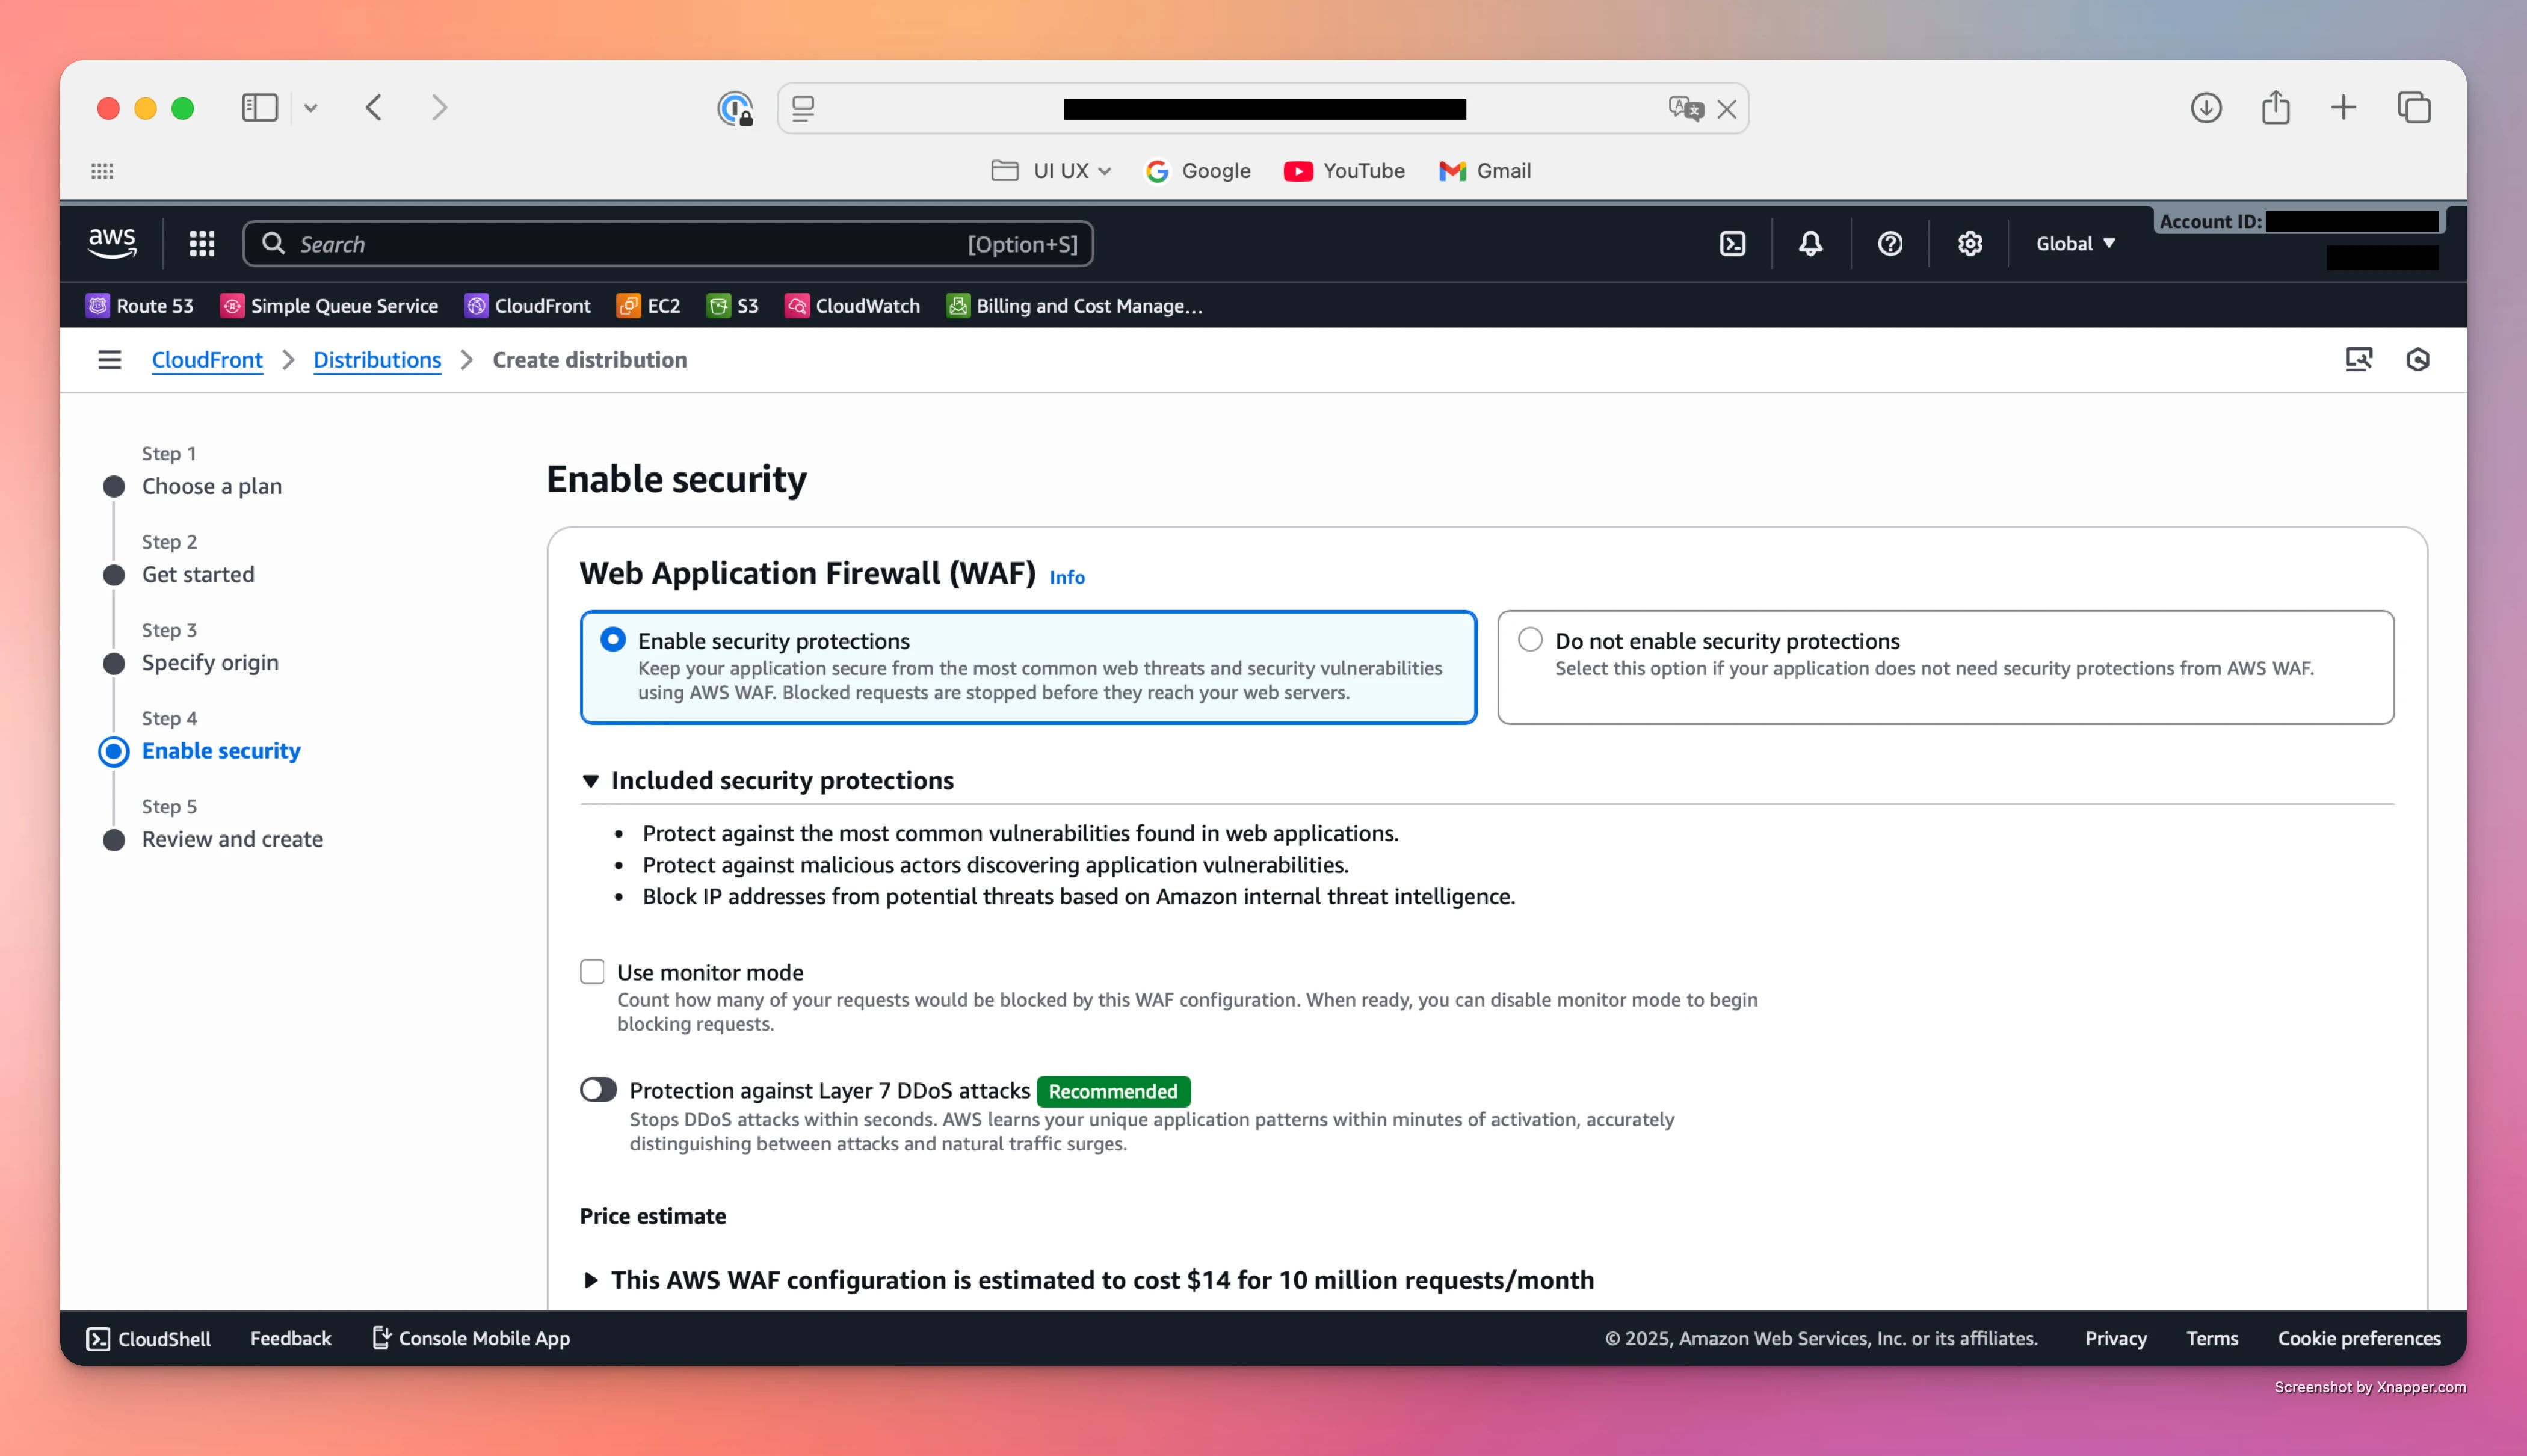
Step 4 – Enable security
This step configures Web Application Firewall (WAF) protections.
You have two choices:
1. ✅ Enable security protections
Includes:
- Protection against common web vulnerabilities
- Malicious traffic filtering
- IP blocking
- Optional Layer 7 DDoS protection (Recommended)
Best for dynamic apps, APIs, login pages, or any high-traffic service.
2. ❌ Do not enable security protections
Good option if you're serving static files only and want to reduce cost.
Optional:
- Use monitor mode — view what would be blocked before enforcing it.
Click Next after choosing.
Step 5 – Review and create
CloudFront will display a summary of your configuration:
General configuration
- Distribution name
- Billing (e.g., Pay-as-you-go)
Origin
- S3 origin (bucket + region)
- Origin path
- CloudFront access: Yes
Cache settings
- Using recommended S3-optimized cache settings
Security
- Whether WAF protections are enabled
If everything looks correct:
✅ Click Create distribution
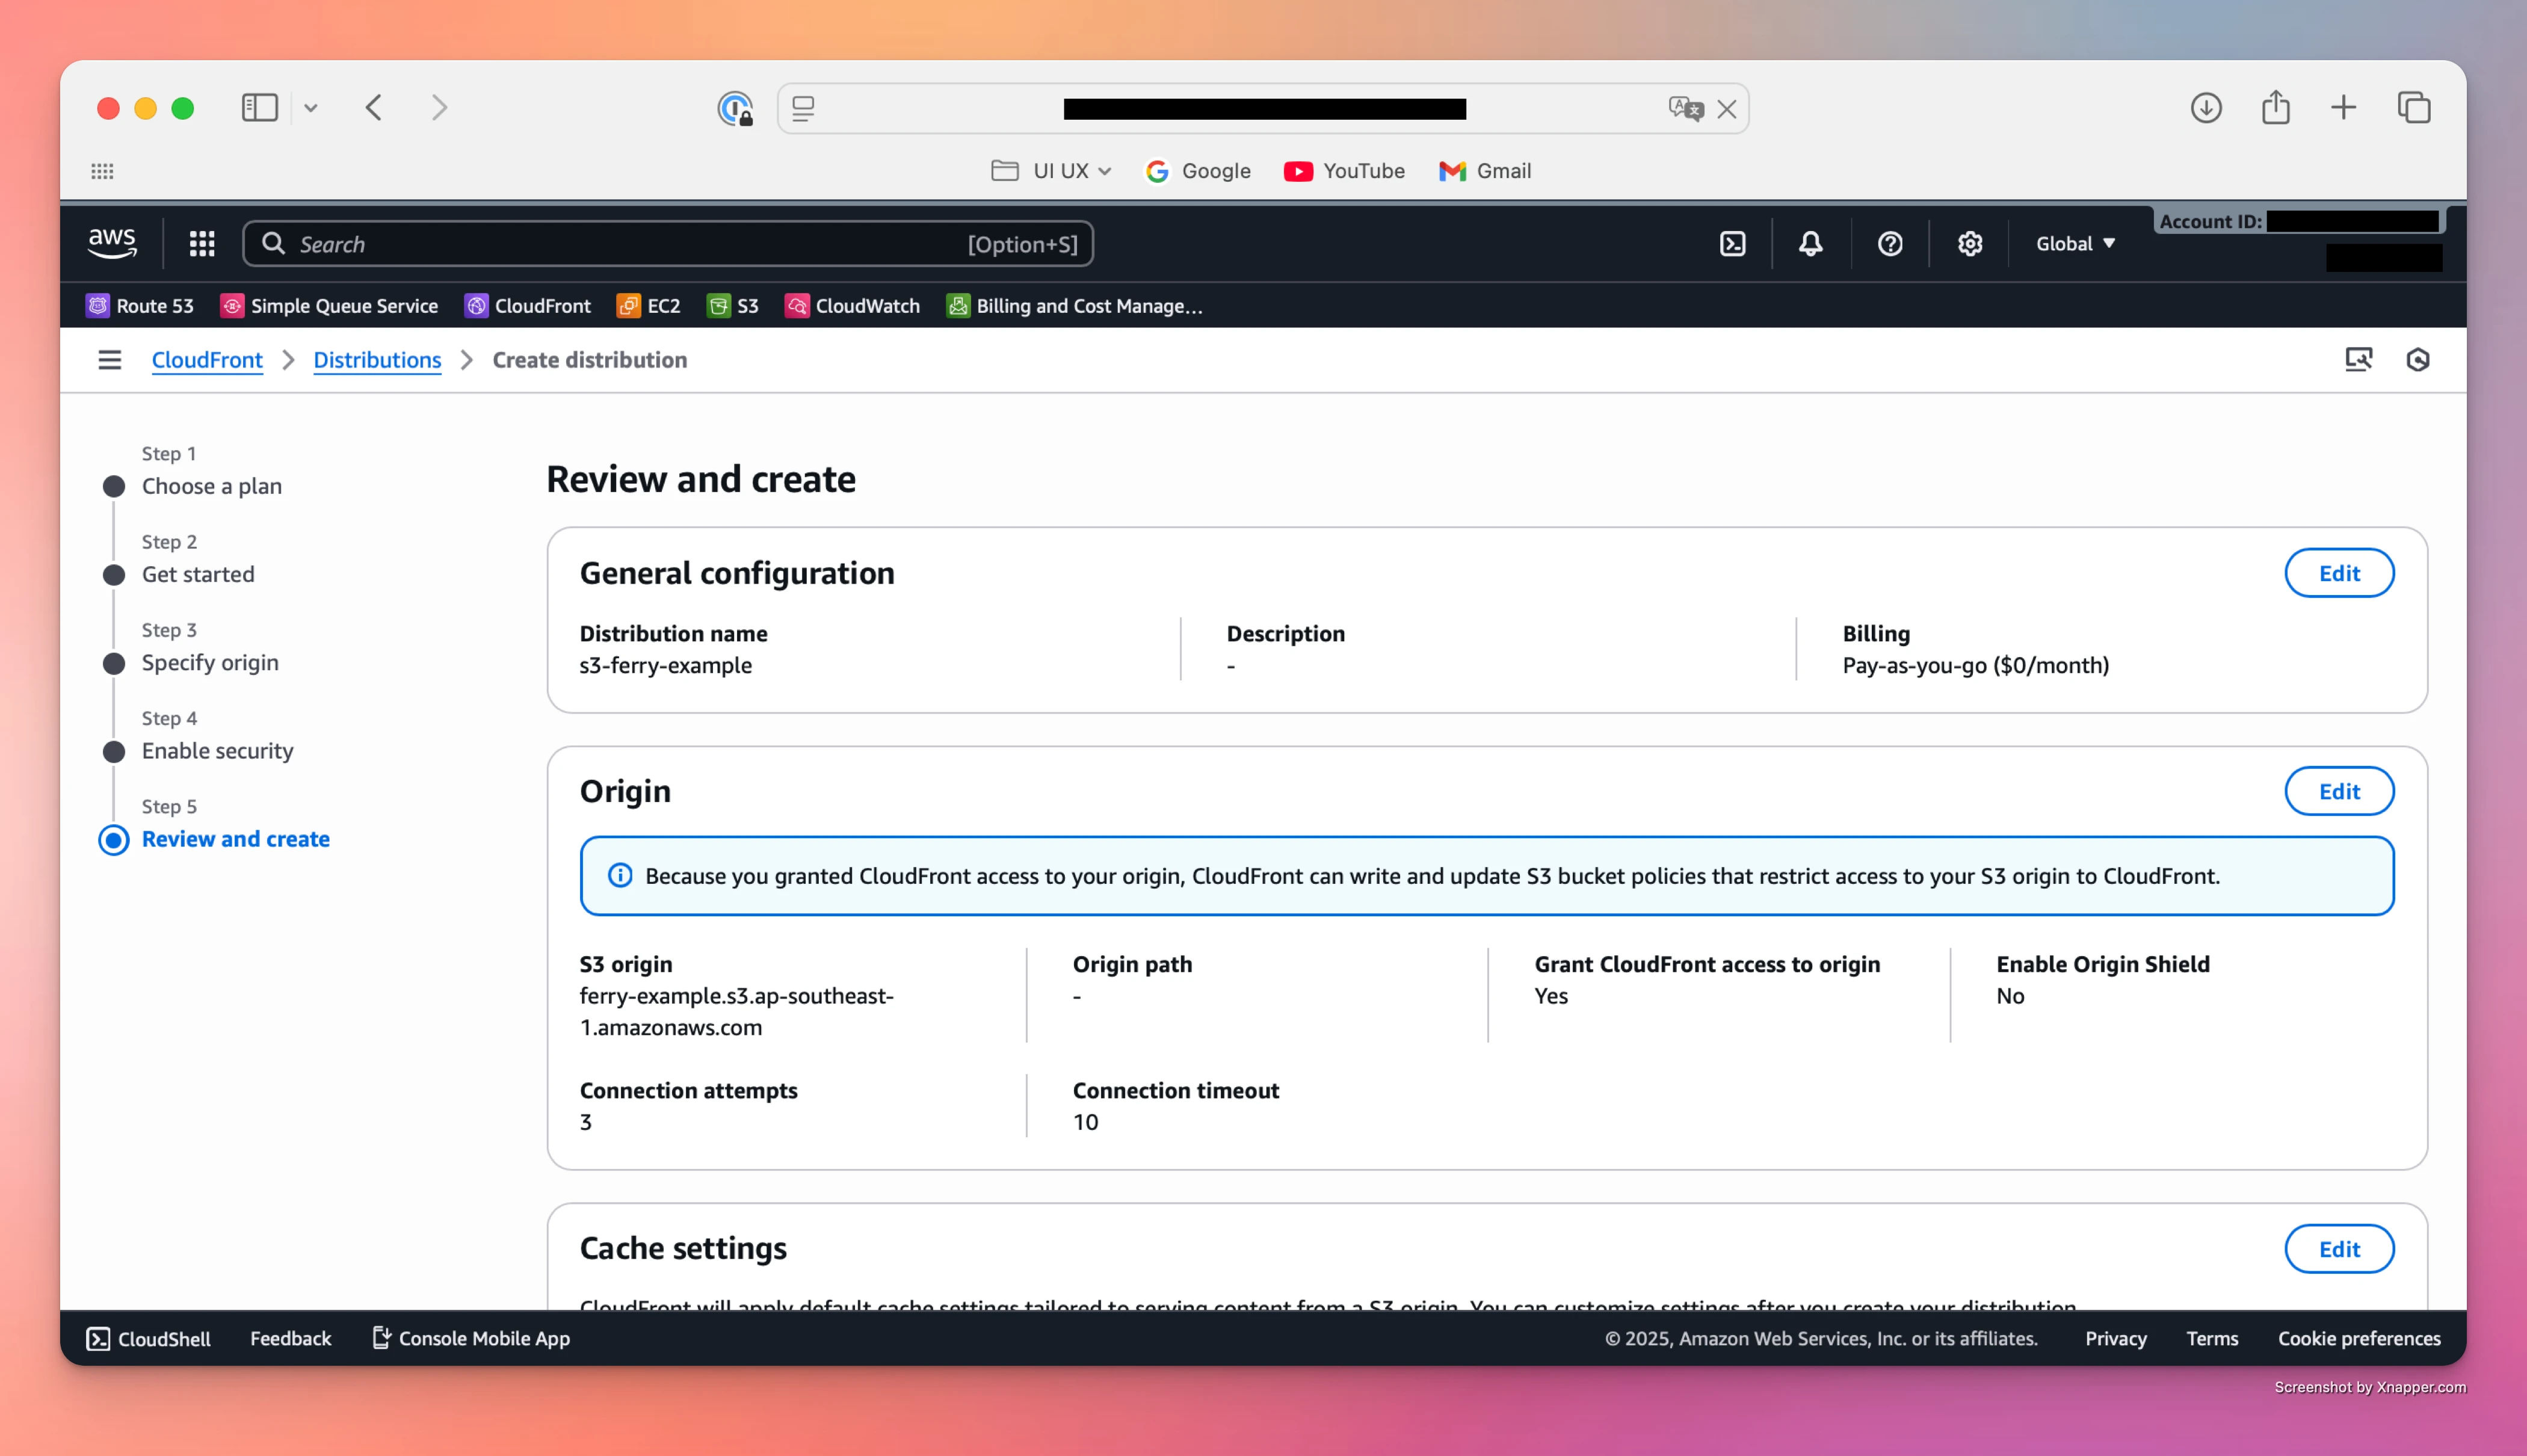
Wait a few minutes until the status becomes Enabled.
Conclusion
Updating your S3 URLs to CloudFront is one of the most effective ways to improve website speed, reliability, and security. The process is simple: create a CloudFront distribution, link it with your S3 bucket, and replace your S3 URLs with your new CloudFront domain.