How to Point Your Domain to AWS Route 53 Name Servers
Author: Ferry Dermawan
Date:
Tags: aws, devops
If you're hosting a website or application on AWS, using Amazon Route 53 as your DNS provider gives you full control over routing traffic. In this guide, you'll learn how to move your domain's name servers to Route 53.
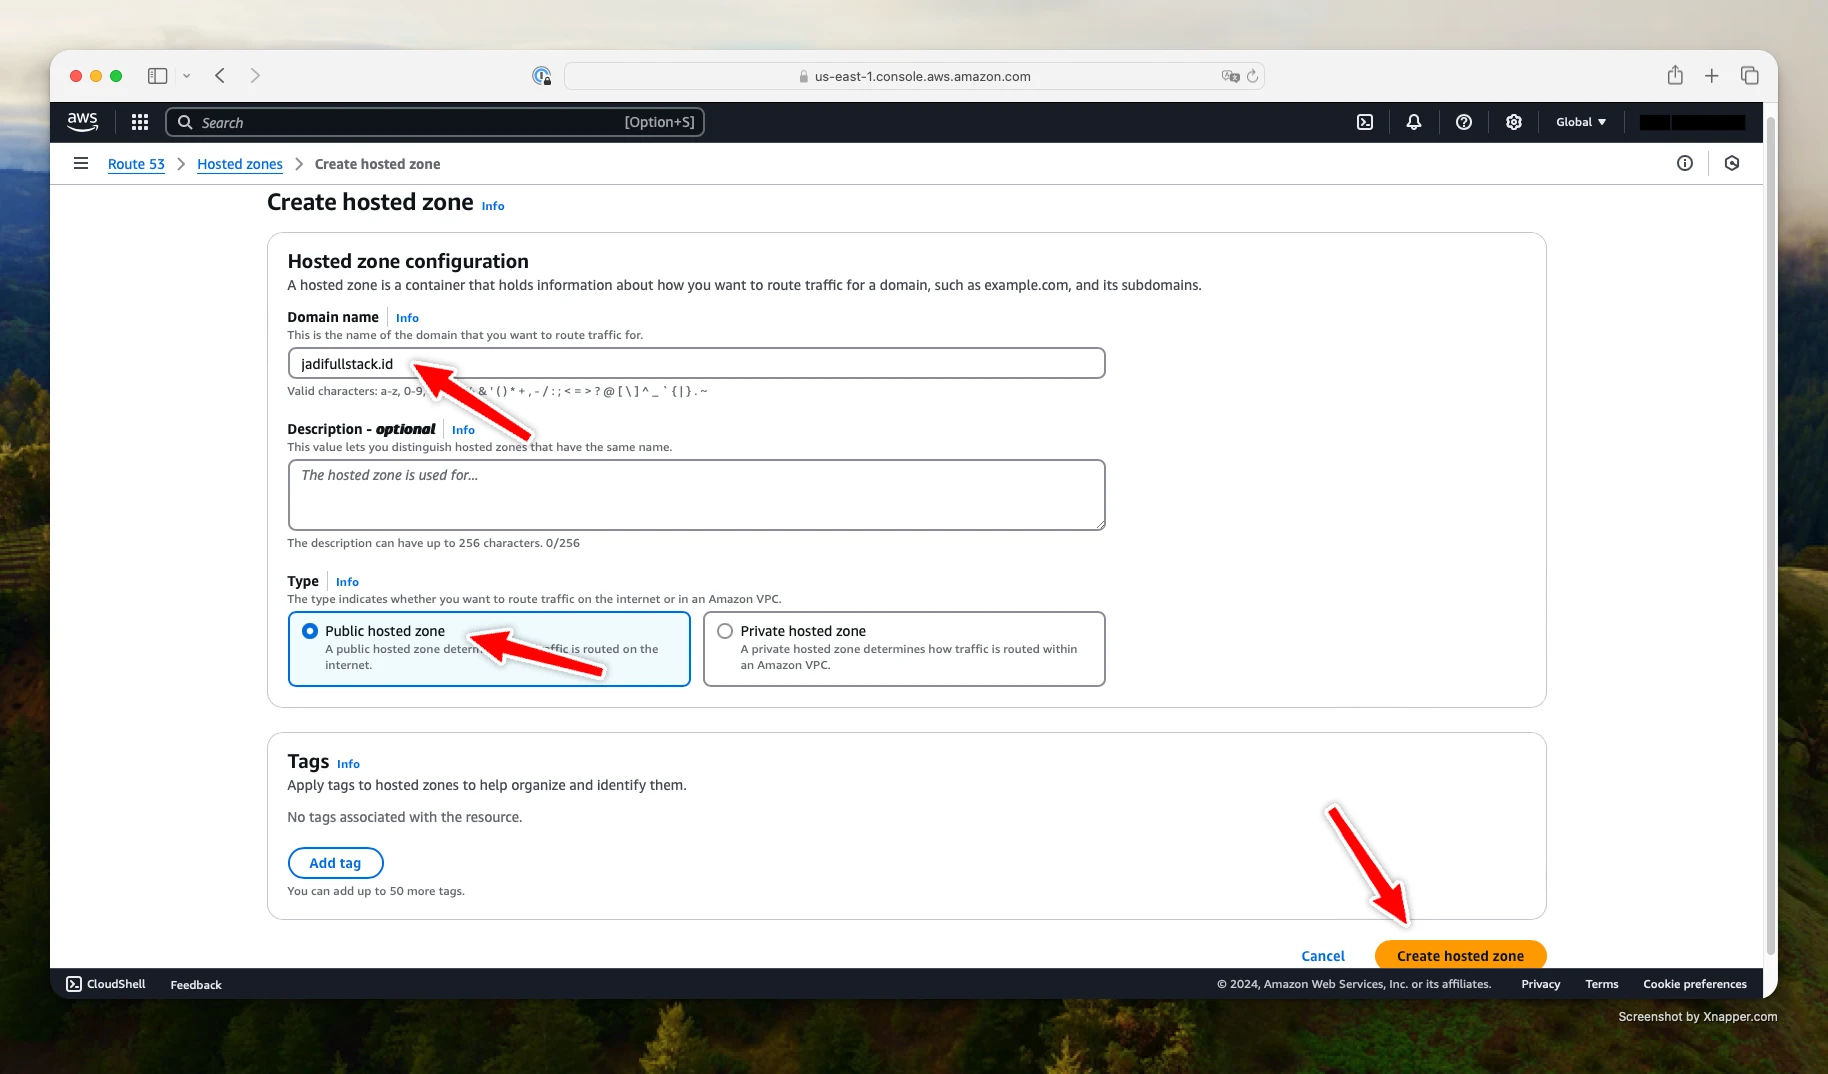
Step 1: Create a Public Hosted Zone in Route 53
Go to the AWS Route 53 Console. Click on Hosted zones in the sidebar, then choose Create hosted zone.
- Enter your domain name.
- Choose Public hosted zone.
- Click Create hosted zone.
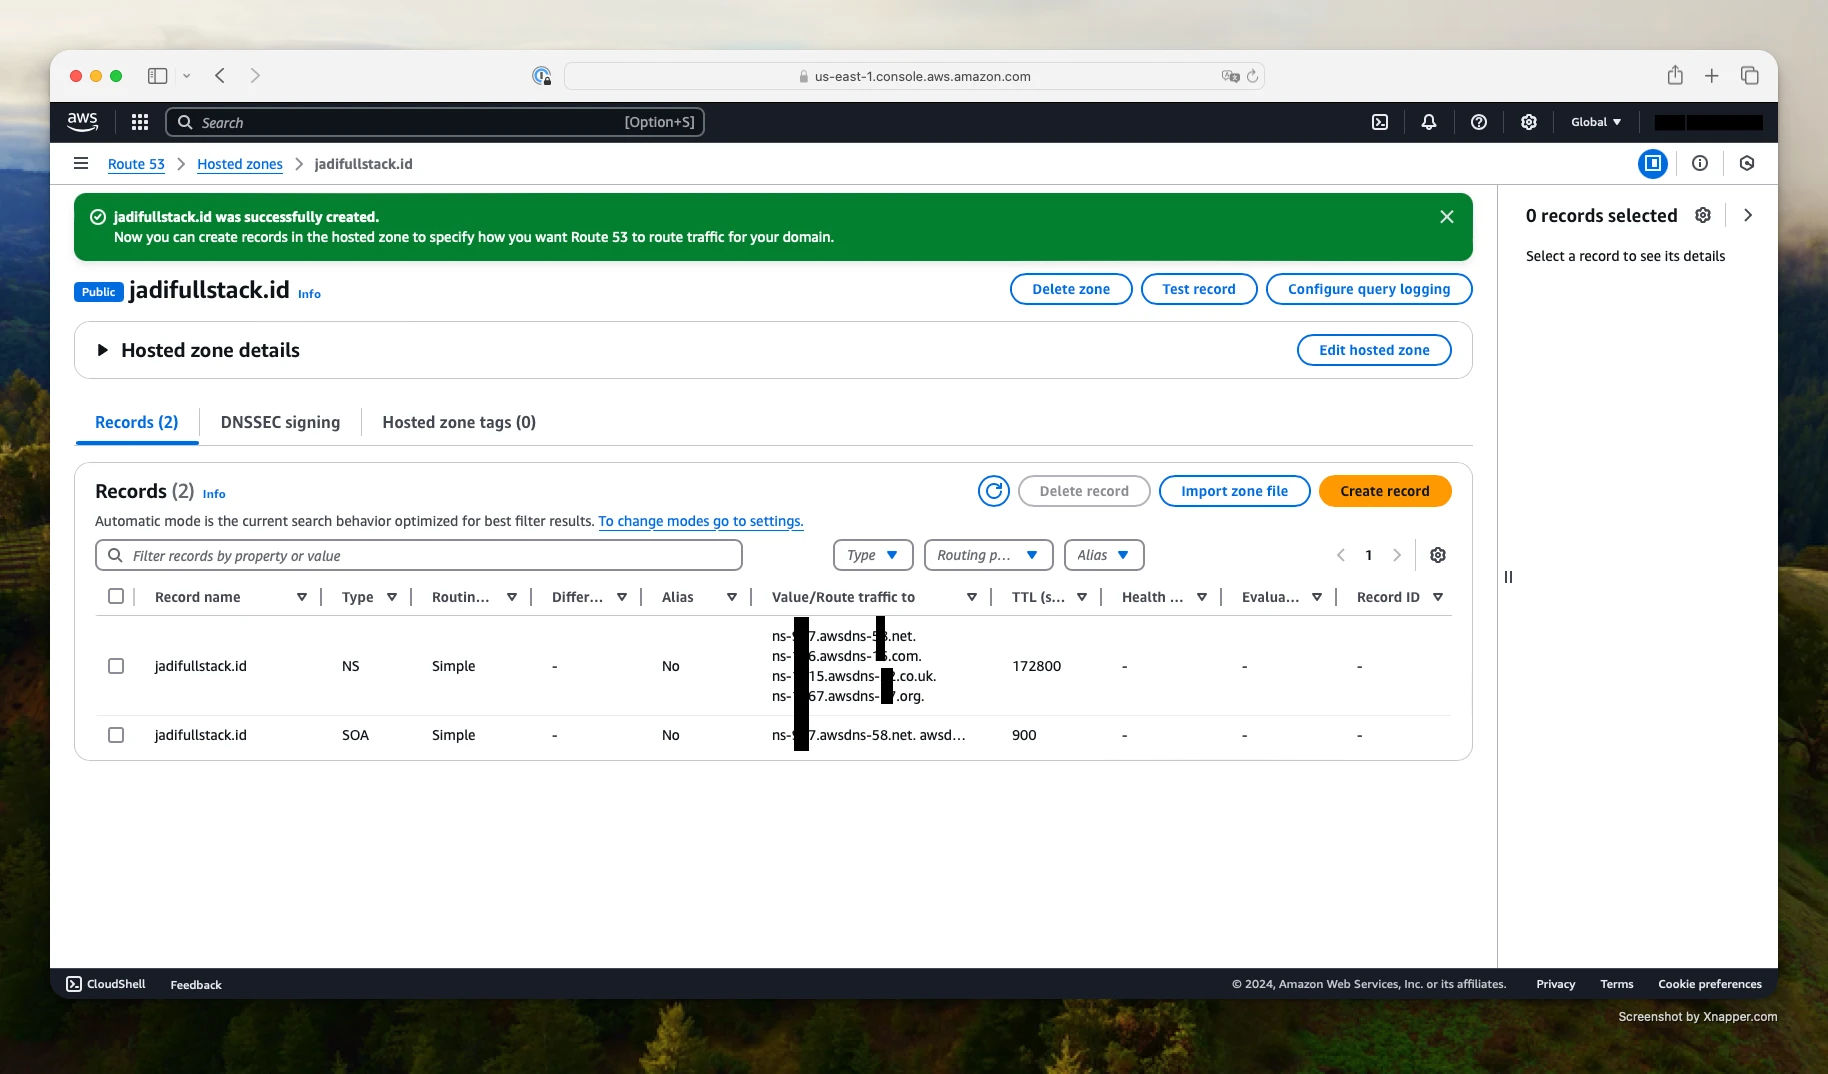
Step 2: View Your Route 53 NS Records
After creating the hosted zone, Route 53 automatically generates several records, including the NS (Name Server) records. These are the name servers you need to use for your domain.
Step 3: Update Name Servers on Your Domain Registrar (GoDaddy Example)
Log in to your domain registrar (e.g., GoDaddy), go to your domain settings, and choose Manage DNS.
- Scroll to Nameservers and choose: I'll use my own nameservers.
- Copy and paste the NS records from Route 53 into the fields.
- Save the changes.

Note: DNS changes can take up to 48 hours to fully propagate.
Conclusion
Using AWS Route 53 as your DNS provider helps ensure high availability, fast response times, and tight integration with other AWS services. After updating your nameservers, you can manage DNS records directly from the Route 53 dashboard.
Be sure to monitor your DNS configuration and test it using tools like dig, nslookup, or online DNS checkers to verify the update was successful.