How to Create an AWS EC2 Instance: Beginner’s Guide to Cloud Hosting
Author: Ferry Dermawan
Date:
Tags: aws, devops
Amazon EC2 (Elastic Compute Cloud) lets you run virtual servers in the cloud. In this beginner-friendly guide, you’ll learn how to launch your first EC2 instance on AWS using Ubuntu and Free Tier resources.
Step 1: Log In to the AWS Console
Go to the AWS Console and log in with your credentials.


Step 2: Search for EC2 Service
In the search bar at the top, type EC2 and click on the EC2 service.

Step 3: Launch a New EC2 Instance
Click the Launch Instances button.

Step 4: Choose an Amazon Machine Image (AMI)
Choose Ubuntu or a similar Free Tier-eligible AMI.

Step 5: Choose an Instance Type
Select t2.micro, which is eligible for the AWS Free Tier.

Step 6: Configure Instance Details
Set the number of instances to 1.

Step 7: Add Storage
Keep the default of 8 GiB, which is sufficient for basic applications.

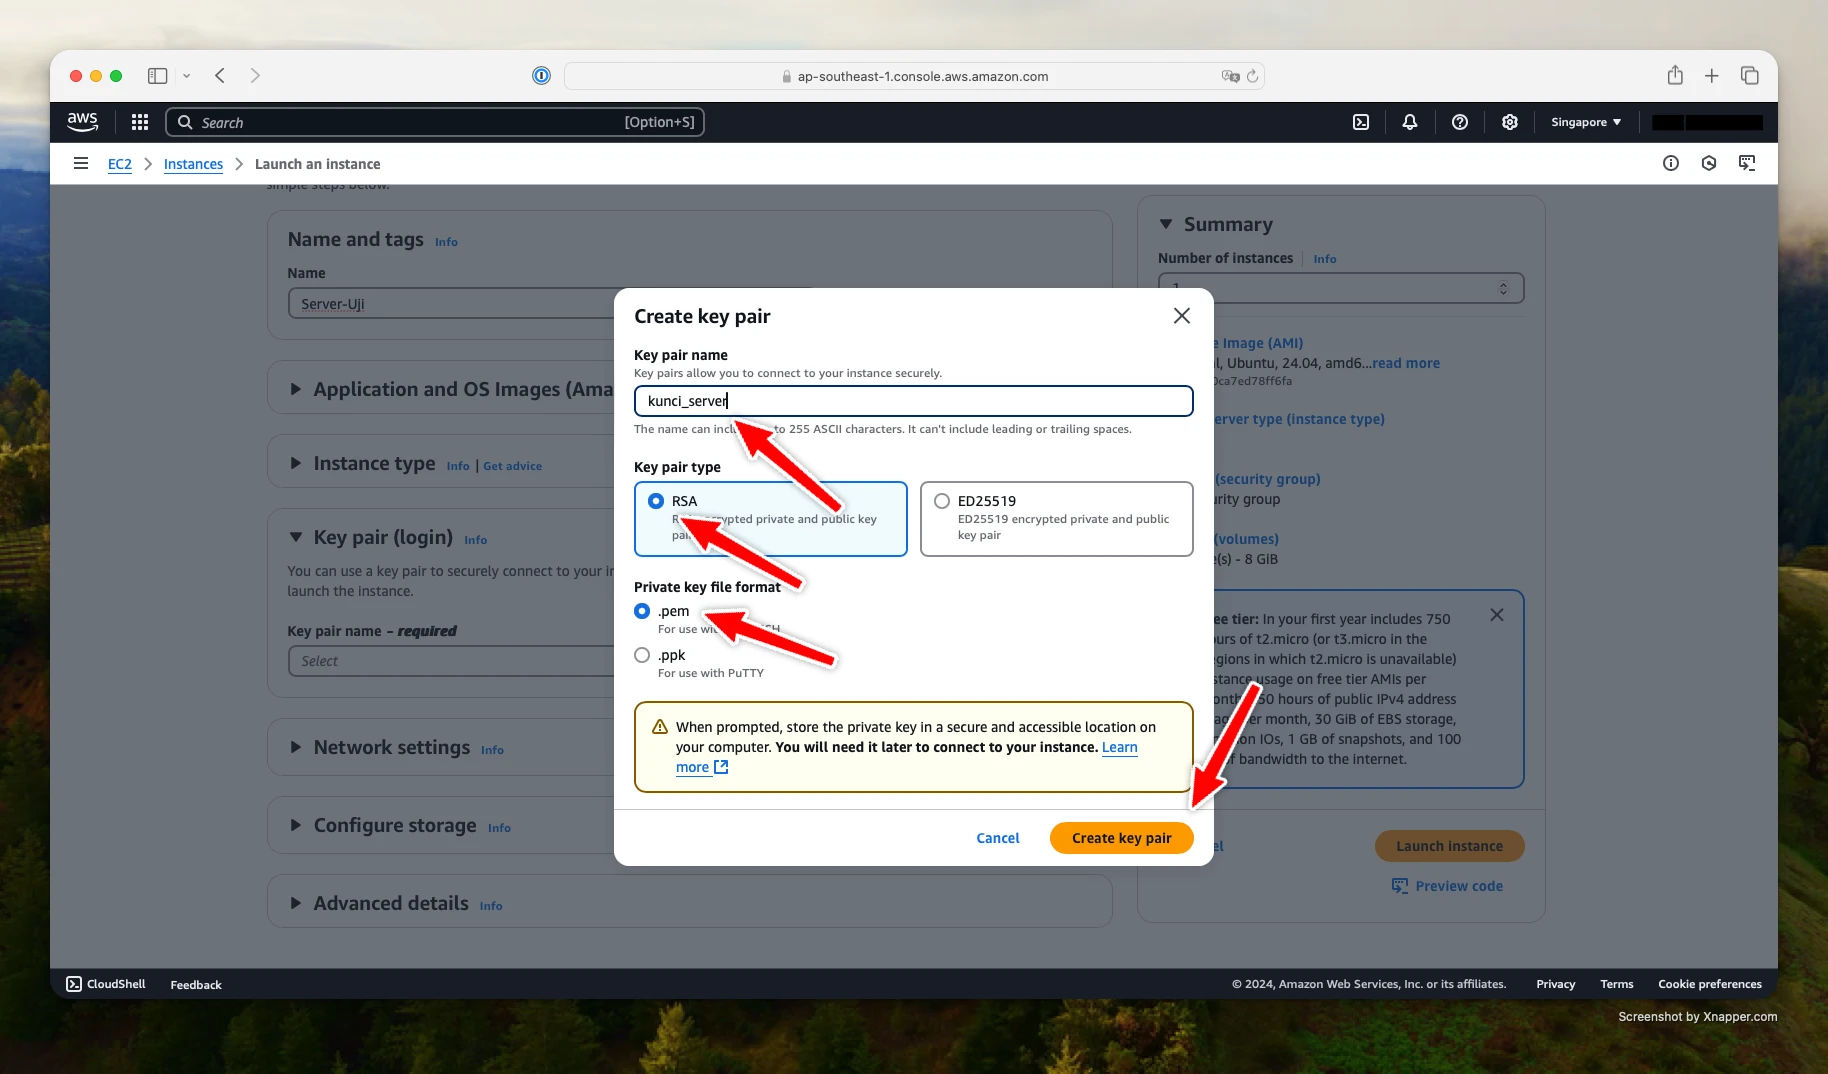
Step 8: Create a Key Pair
Create a new key pair to access the server:
- Type: RSA
- Format:
.pem
Download and save the key securely.
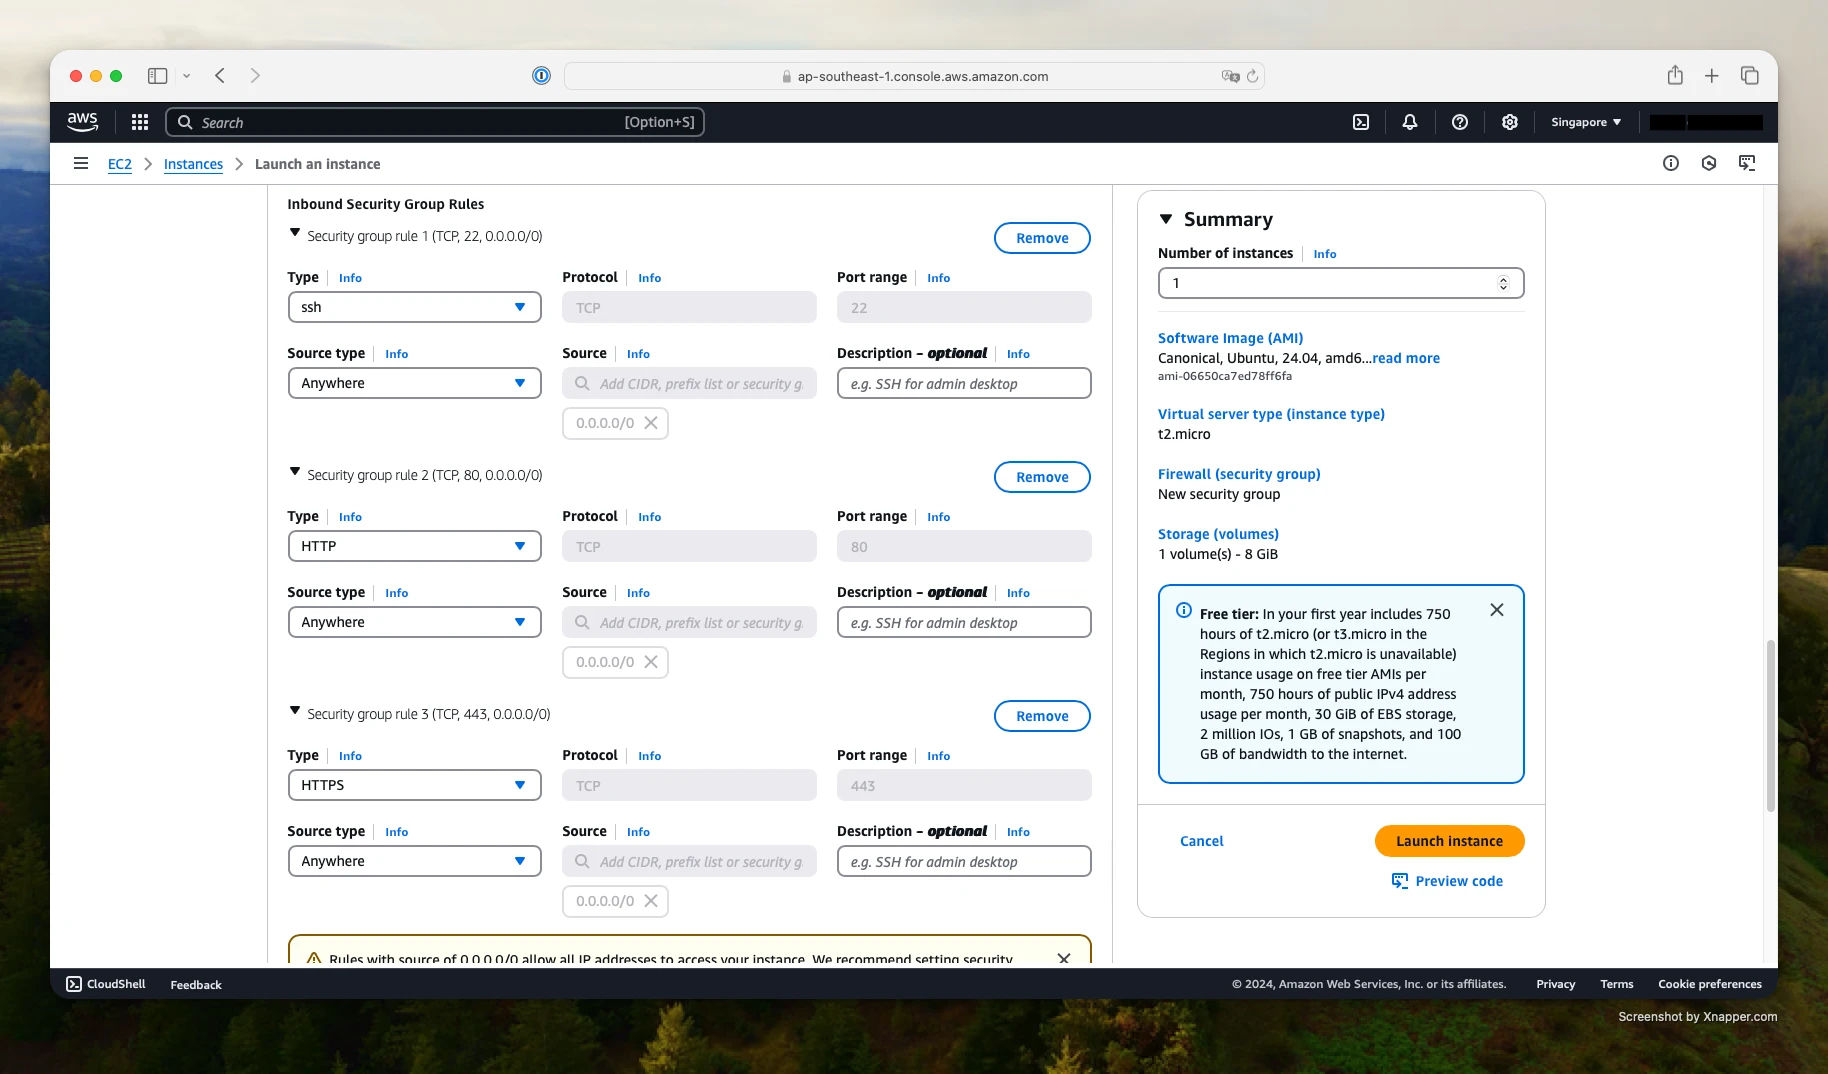
Step 9: Configure Security Group
Add inbound rules for the following protocols:
- SSH (port 22)
- HTTP (port 80)
- HTTPS (port 443)
Then click Launch Instances.
Step 10: View Running Instances
Once launched, you will see your EC2 instance listed on the dashboard.
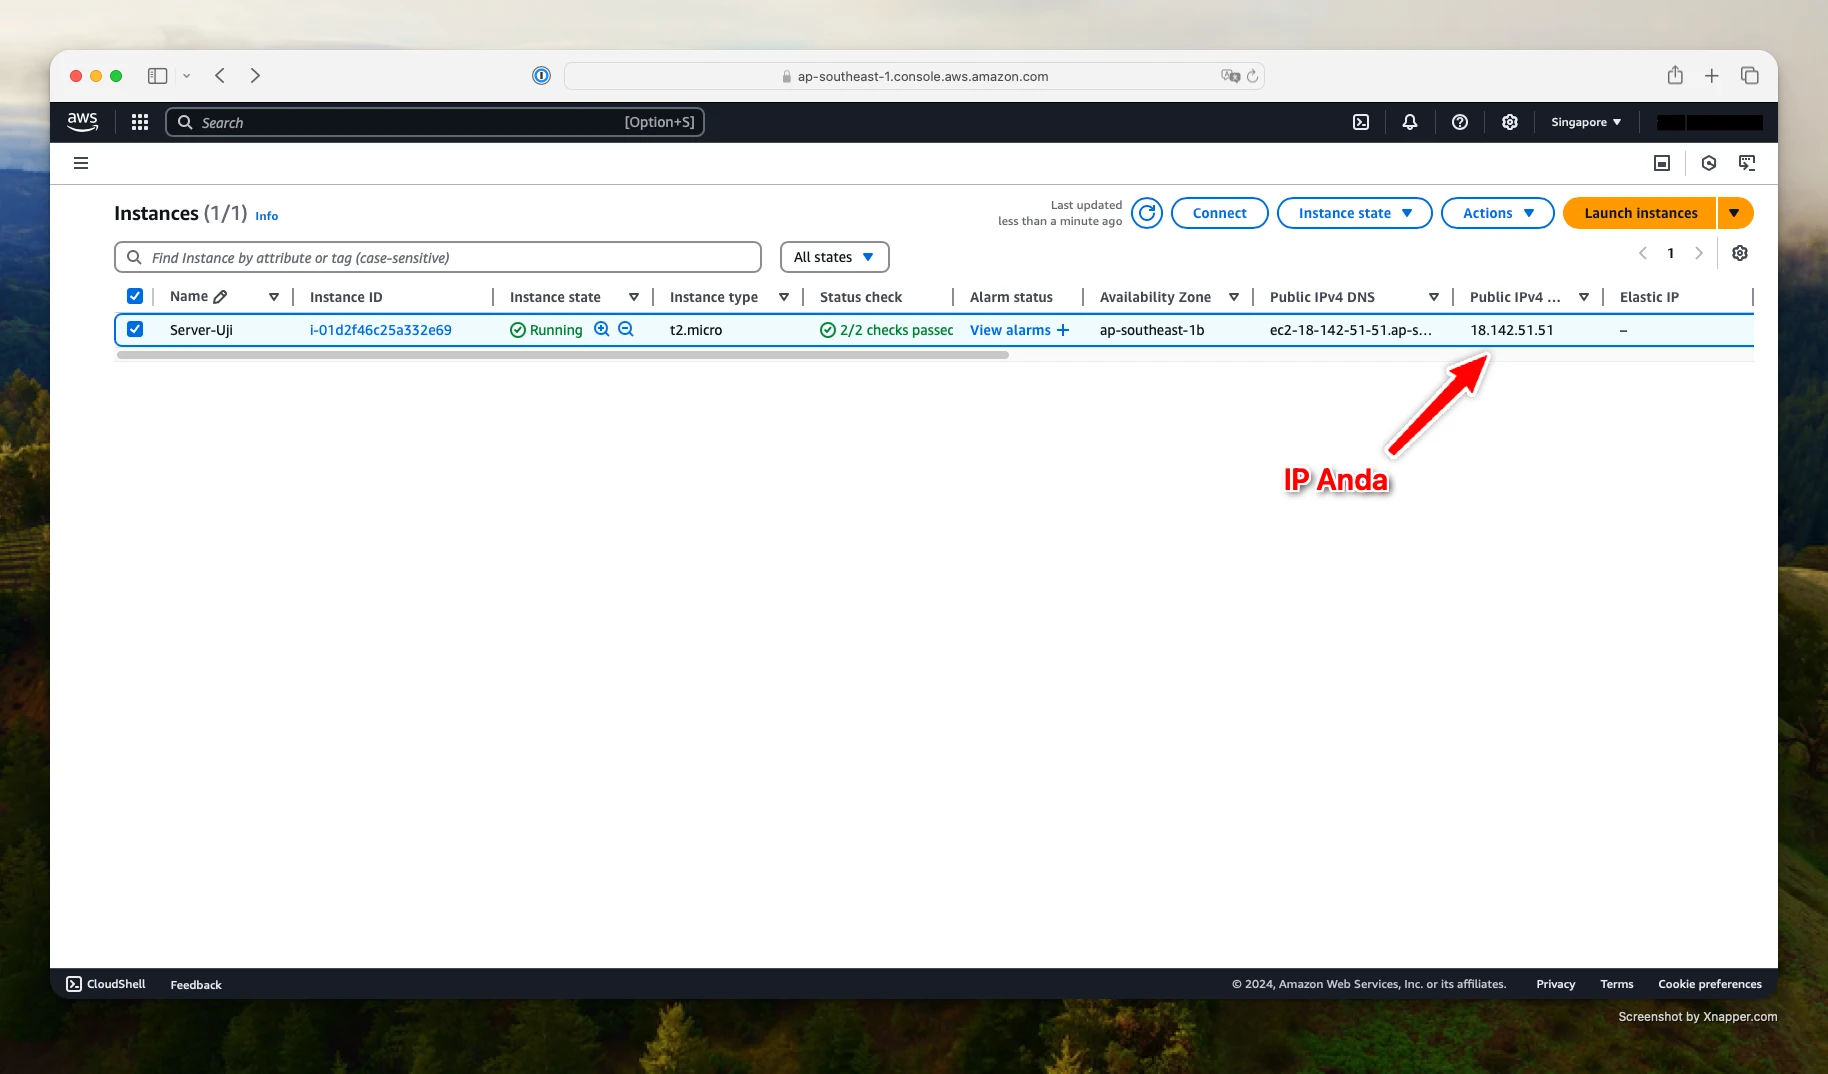
Step 11: Connect to Your Instance via SSH
Open your terminal and connect to your instance using the .pem key:
chmod 400 your-key.pem
ssh -i your-key.pem ubuntu@your-ec2-public-ip
Replace your-ec2-public-ip with the public IPv4 address of your EC2 instance.

Conclusion
You’ve successfully launched and connected to an EC2 instance using the AWS Free Tier. From here, you can deploy web apps, run servers, and explore AWS cloud services. Be sure to stop or terminate unused instances to avoid unexpected charges.